

Hair transplant in Dammam: step-by-step procedure guide
Hair transplant surgery is a major decision, and knowing exactly what to expect can make the process smoother and less stressful. In Dammam, modern clinics follow standardized, safe procedures that prioritize natural results and patient comfort. This guide breaks down the typical hair transplant process from the first consultation to the final results. Hair transplant in Dammam can provide a natural-looking hairline and long-lasting results when performed with the right technique and aftercare.
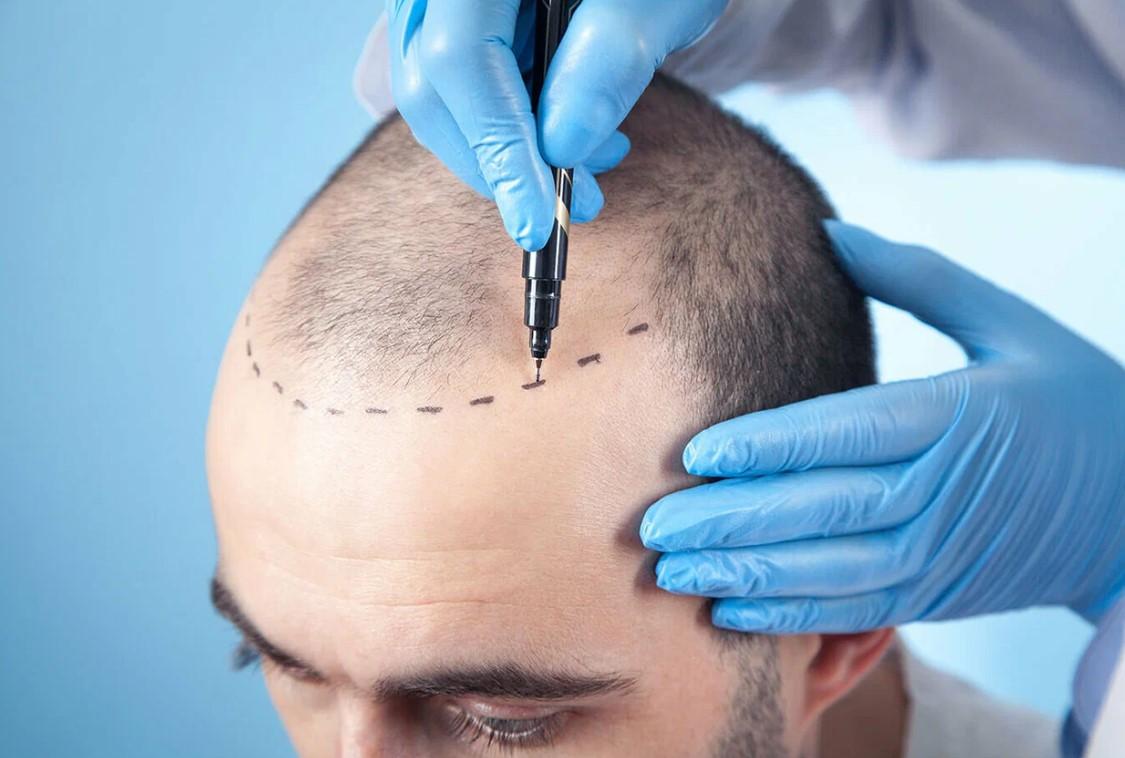
1. Initial Consultation and Assessment
The first step is a detailed consultation with a qualified hair transplant surgeon. During this visit, the doctor will:
-
Examine your scalp to determine the pattern and stage of hair loss.
-
Assess the quality and density of the donor area (usually the back and sides of the scalp).
-
Discuss your goals, desired hairline, and expectations.
-
Review your medical history, medications, and any underlying conditions.
-
Explain the best technique for your situation (FUE, FUT, DHI, etc.).
-
Provide an estimated graft count and cost.
This consultation is essential because it sets the foundation for realistic expectations and a successful outcome.
2. Pre-Procedure Preparation
Once you decide to proceed, the clinic will provide pre-operative instructions. Common preparation steps include:
-
Avoiding blood thinners such as aspirin, ibuprofen, or certain supplements for a few days before surgery.
-
Stopping smoking and alcohol consumption at least one week prior, as they can affect healing.
-
Washing your hair thoroughly on the day of the procedure.
-
Avoiding caffeine on the morning of surgery to reduce anxiety and bleeding.
-
Eating a light meal before the procedure (since it can be long).
Some clinics may also ask you to arrive early and complete consent forms, and take photos for documentation.
3. Local Anesthesia
Hair transplant procedures are performed under local anesthesia, which means you remain awake but do not feel pain in the treated area. The surgeon will numb both:
-
The donor area (where grafts will be taken).
-
The recipient area (where grafts will be implanted).
You may feel slight pressure or mild discomfort during the injection, but the anesthesia works quickly and makes the rest of the procedure comfortable.
4. Harvesting the Donor Hair
The next step is extracting hair follicles from the donor zone. The method depends on the chosen technique:
FUE (Follicular Unit Extraction):
The surgeon removes individual follicular units using a micro-punch tool. Each graft is carefully extracted and stored.
FUT (Strip Method):
A thin strip of scalp is removed from the donor area. The strip is then dissected into individual grafts under a microscope. The donor area is closed with stitches.
DHI (Direct Hair Implantation):
Similar to FUE for extraction, but the implantation is done with a specialized pen tool.
Harvesting can take several hours depending on the number of grafts. Throughout this time, the surgical team keeps the grafts hydrated and protected to maximize survival.
5. Graft Preparation
Once the follicles are harvested, they are prepared for implantation. This includes:
-
Cleaning the grafts.
-
Sorting them by size (single hair, double hair, triple hair).
-
Keeping them in a special solution to preserve their health.
This stage is important because careful handling directly impacts graft survival and the final result.
6. Creating Recipient Sites
After graft preparation, the surgeon begins creating tiny incisions or recipient sites in the thinning or bald area. The placement of these sites determines:
-
Hairline design
-
Direction and angle of growth
-
Density and natural appearance
The surgeon carefully plans the hairline to match your facial structure and natural hair pattern. This step is crucial for a realistic look.
7. Implantation of Hair Grafts
The grafts are then implanted into the recipient sites. Depending on the technique:
-
In FUE, grafts are placed manually using forceps.
-
In DHI, the grafts are placed directly using the implanter pen, which allows precise depth and angle.
This part of the procedure is meticulous and can take several hours. The surgical team works systematically to ensure even density and natural direction.
8. Final Check and Dressing
After all grafts are placed, the surgeon performs a final check to ensure:
-
Proper placement and distribution
-
Symmetry of the hairline
-
No areas are left sparse
The scalp may be gently cleaned, and a protective dressing or bandage is applied to the donor area. Some clinics also apply a light dressing to the recipient area.
9. Post-Procedure Instructions
Before you leave the clinic, the team provides detailed aftercare instructions, which usually include:
-
How to wash your hair safely after surgery
-
Medications for pain, swelling, and infection prevention
-
Avoiding heavy exercise for a few weeks
-
Avoiding sun exposure and swimming
-
Sleeping with the head elevated for the first few nights
Following these instructions closely is essential for the best outcome.